
Microsoft Information Protection: Unified labeling!
Unified labeling with Microsoft Information Protection
Because this is such a great feature (within Microsoft Information Protection), I will dedicate a seperate blogpost about this, instead of processing this in the Ignite Day 2 blogpost (which you should still read by the way for an overview of selected updates).
All the labeling and encryption technologies throughout the Microsoft stack (currently Windows Information Protection, Office Information Protection and Azure Information Protection), will be manageable from one interface: https://admin.microsoft.com and will be called Microsoft Information Protection. At the end of this year, we should have it all. But not only that, we will also have native labeling and encryption with all Microsoft Office apps! So also on Mac, Android and iOS. That’s very cool right? Notice that if you want this native encryption without installing the AIP client, you should use Microsoft Information Protection. Those labels are cross-application compatible. Microsoft will bring out some sort of migration possibility from AIP to WIP by the way.
Index:
Sensitivity Labels
Microsoft is now using one unified way for labeling: Sensitivity label. This label is customizable as you are used to with Azure Information Protection. So let’s try it out how this new unified way of labeling works.
Go to https://protection.microsoft.com > Classification > Labels > Sensitivity > Create a label.

Name your label.
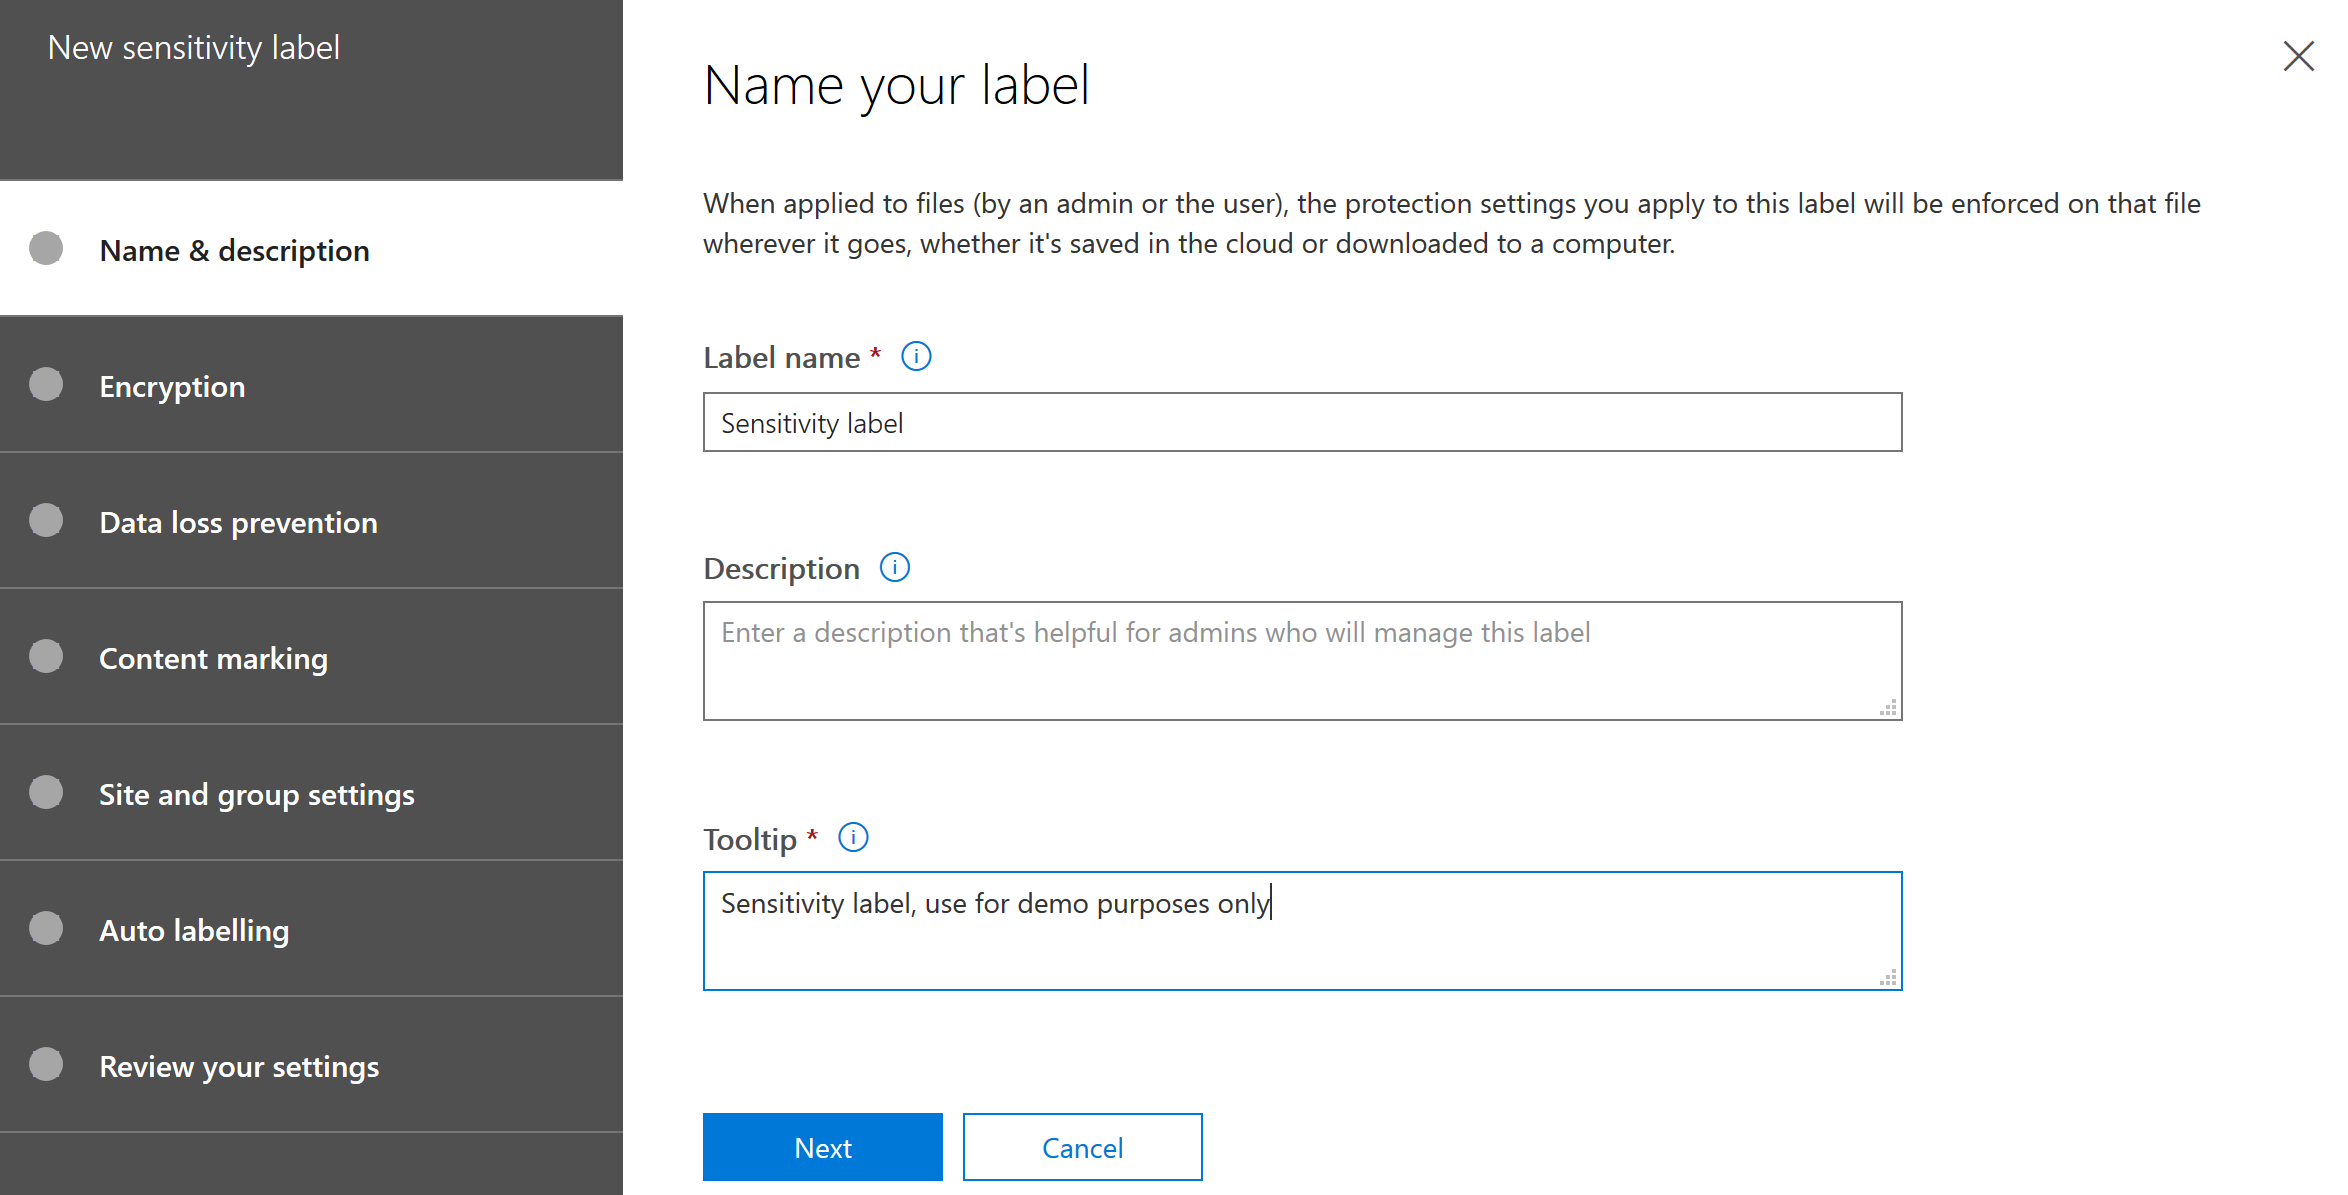
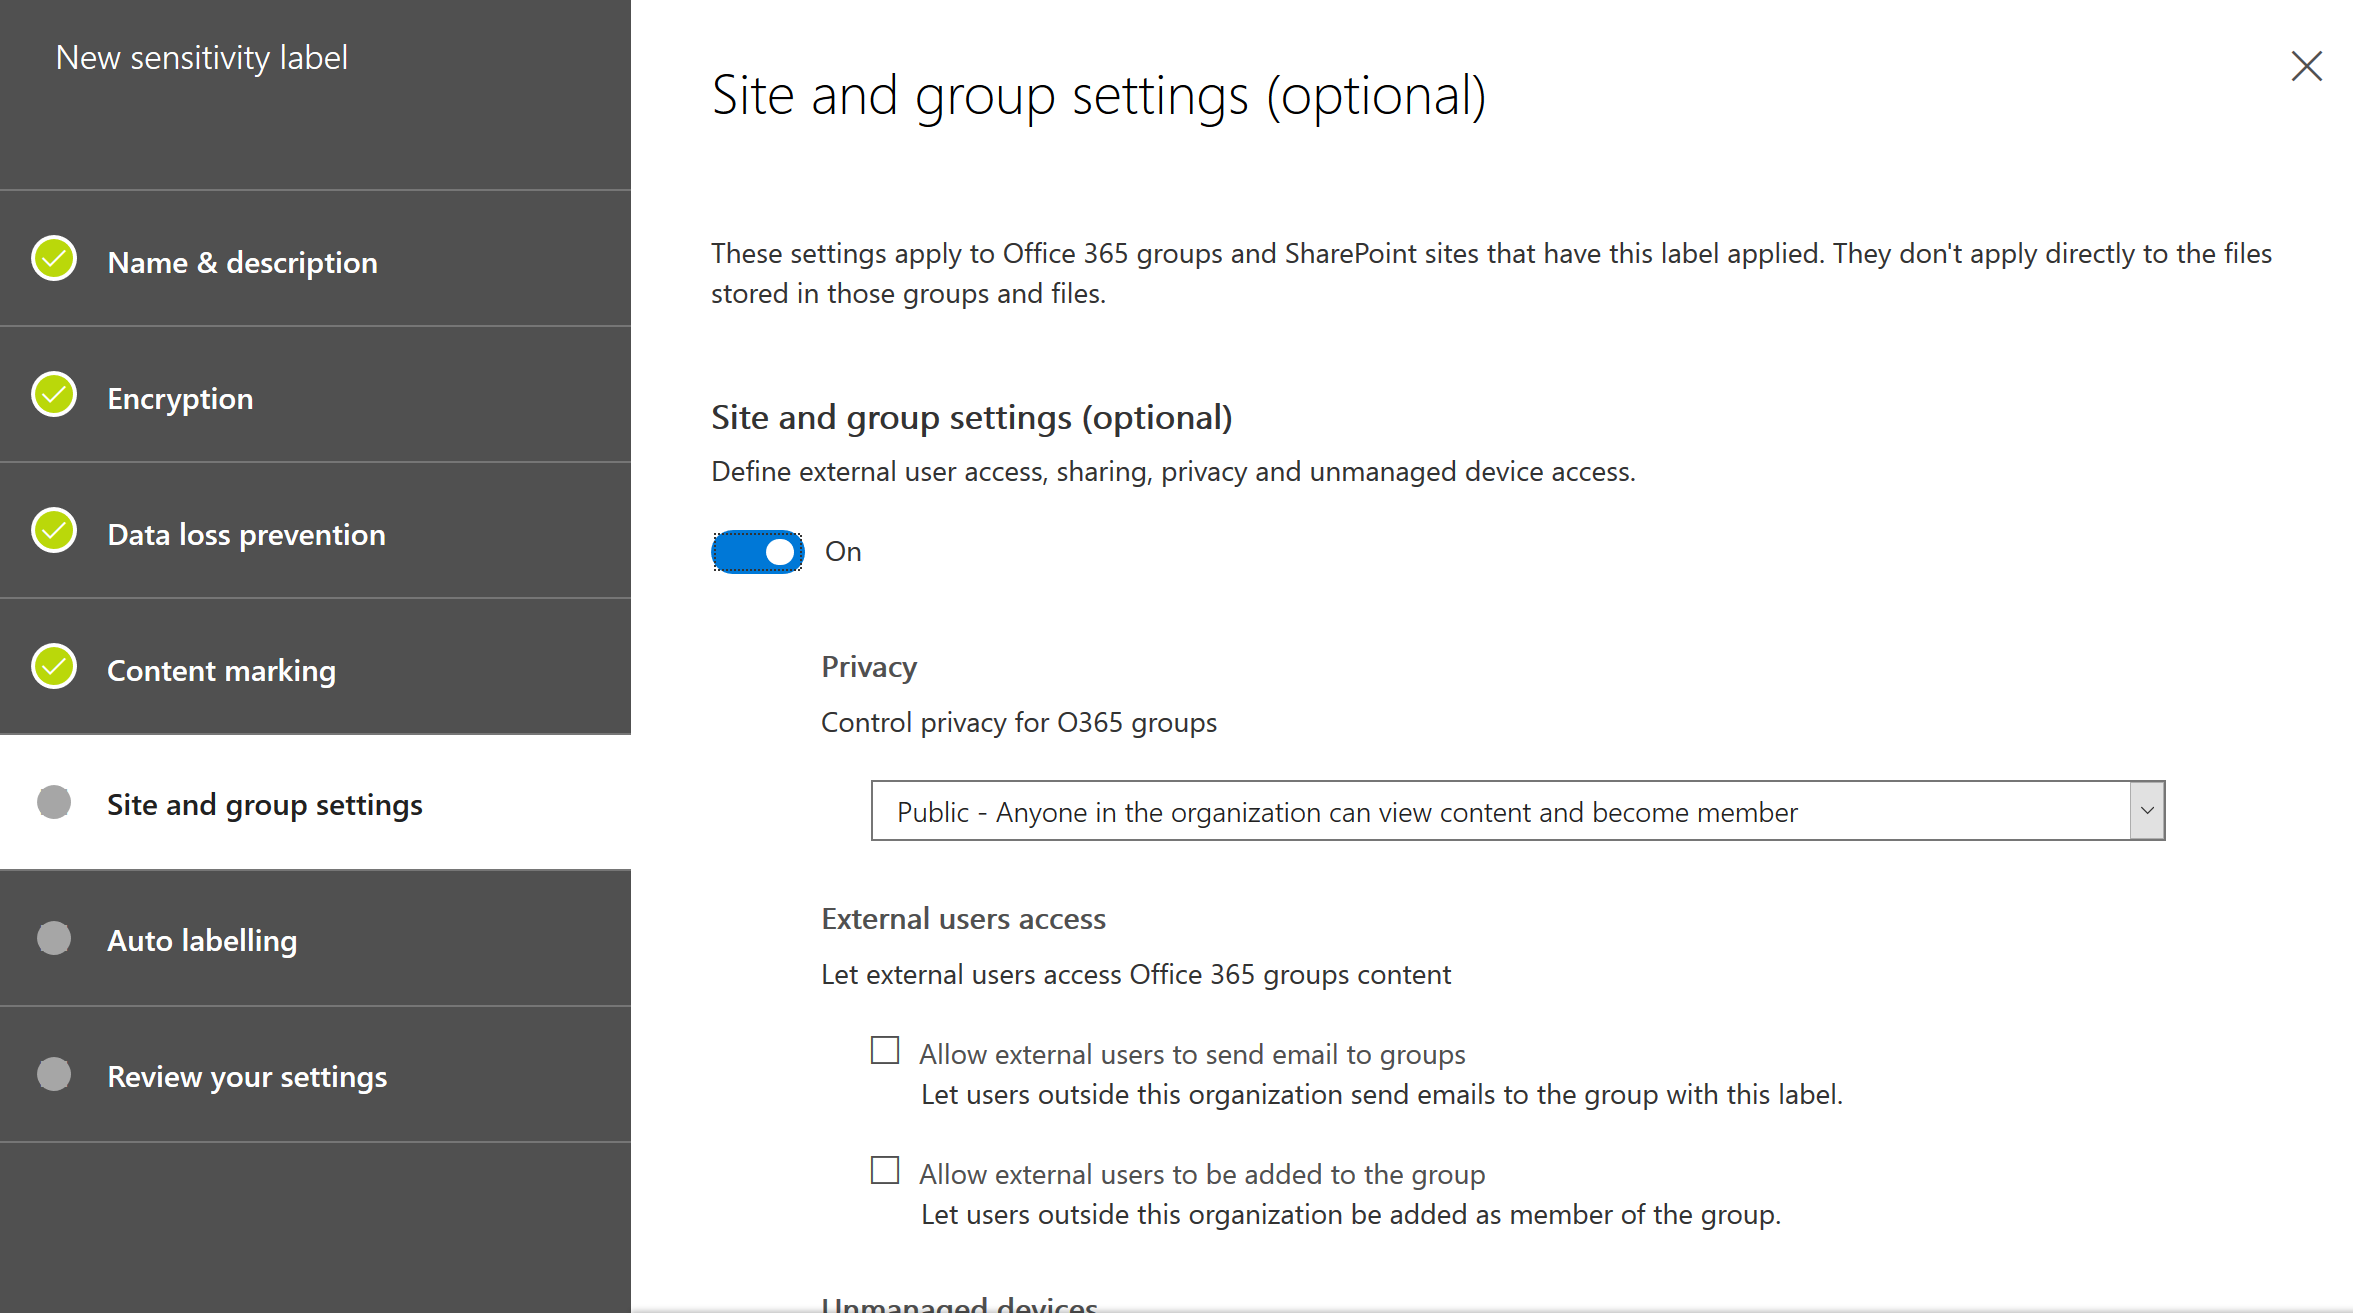
Here you have basically the same options as with Azure Information Protection in the Azure Portal.
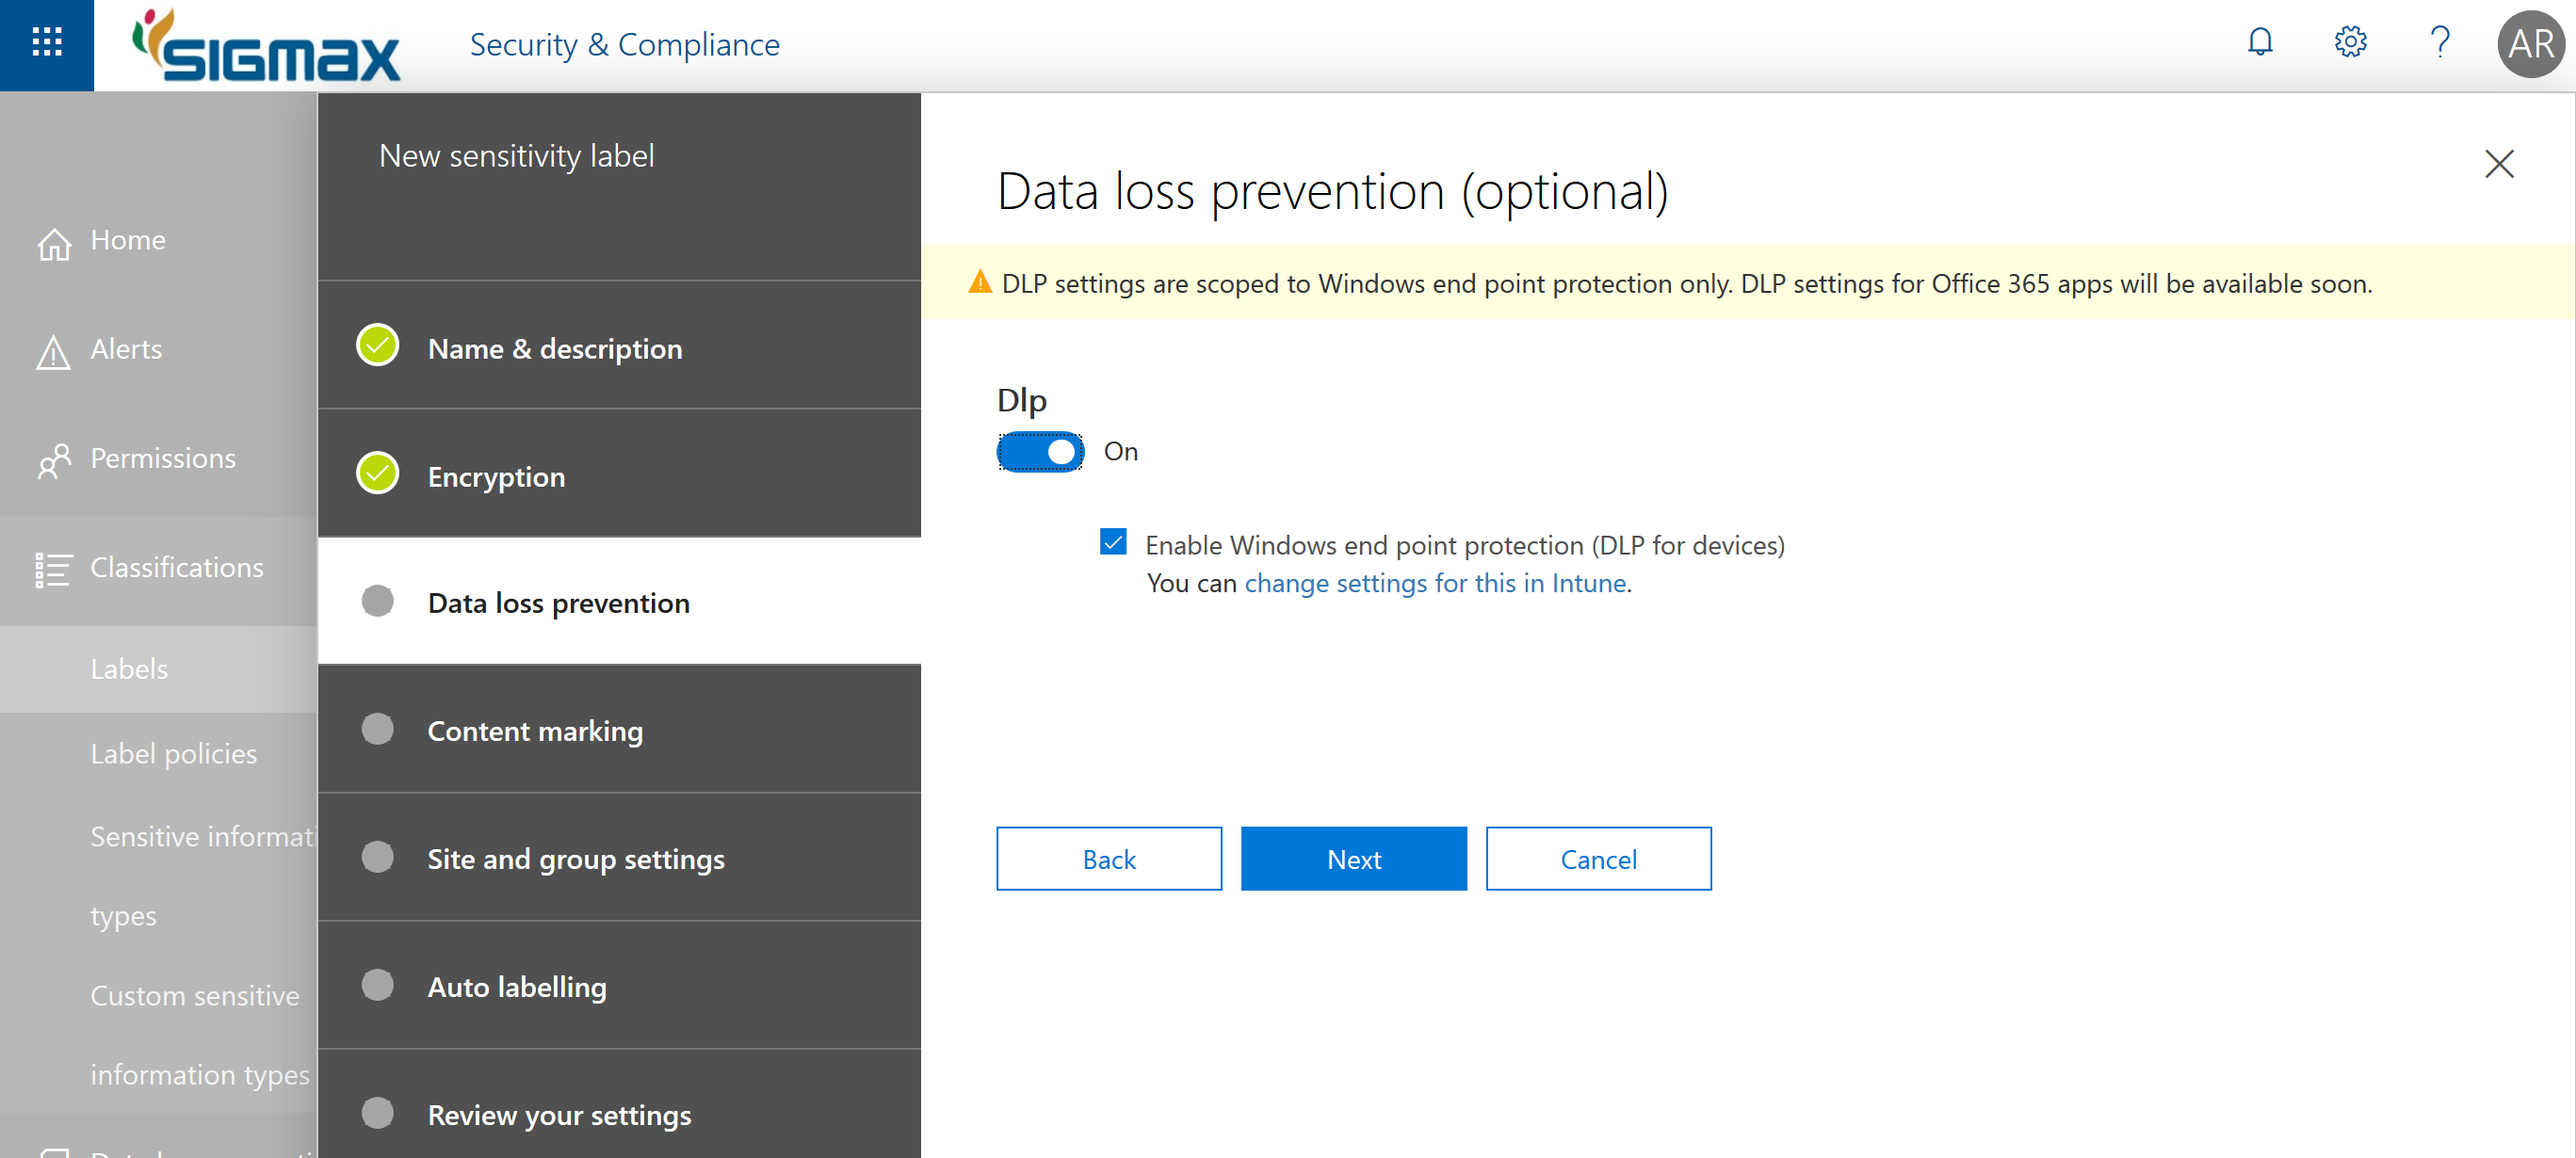
Here starts a great unified feature, enable Windows Information Protection!
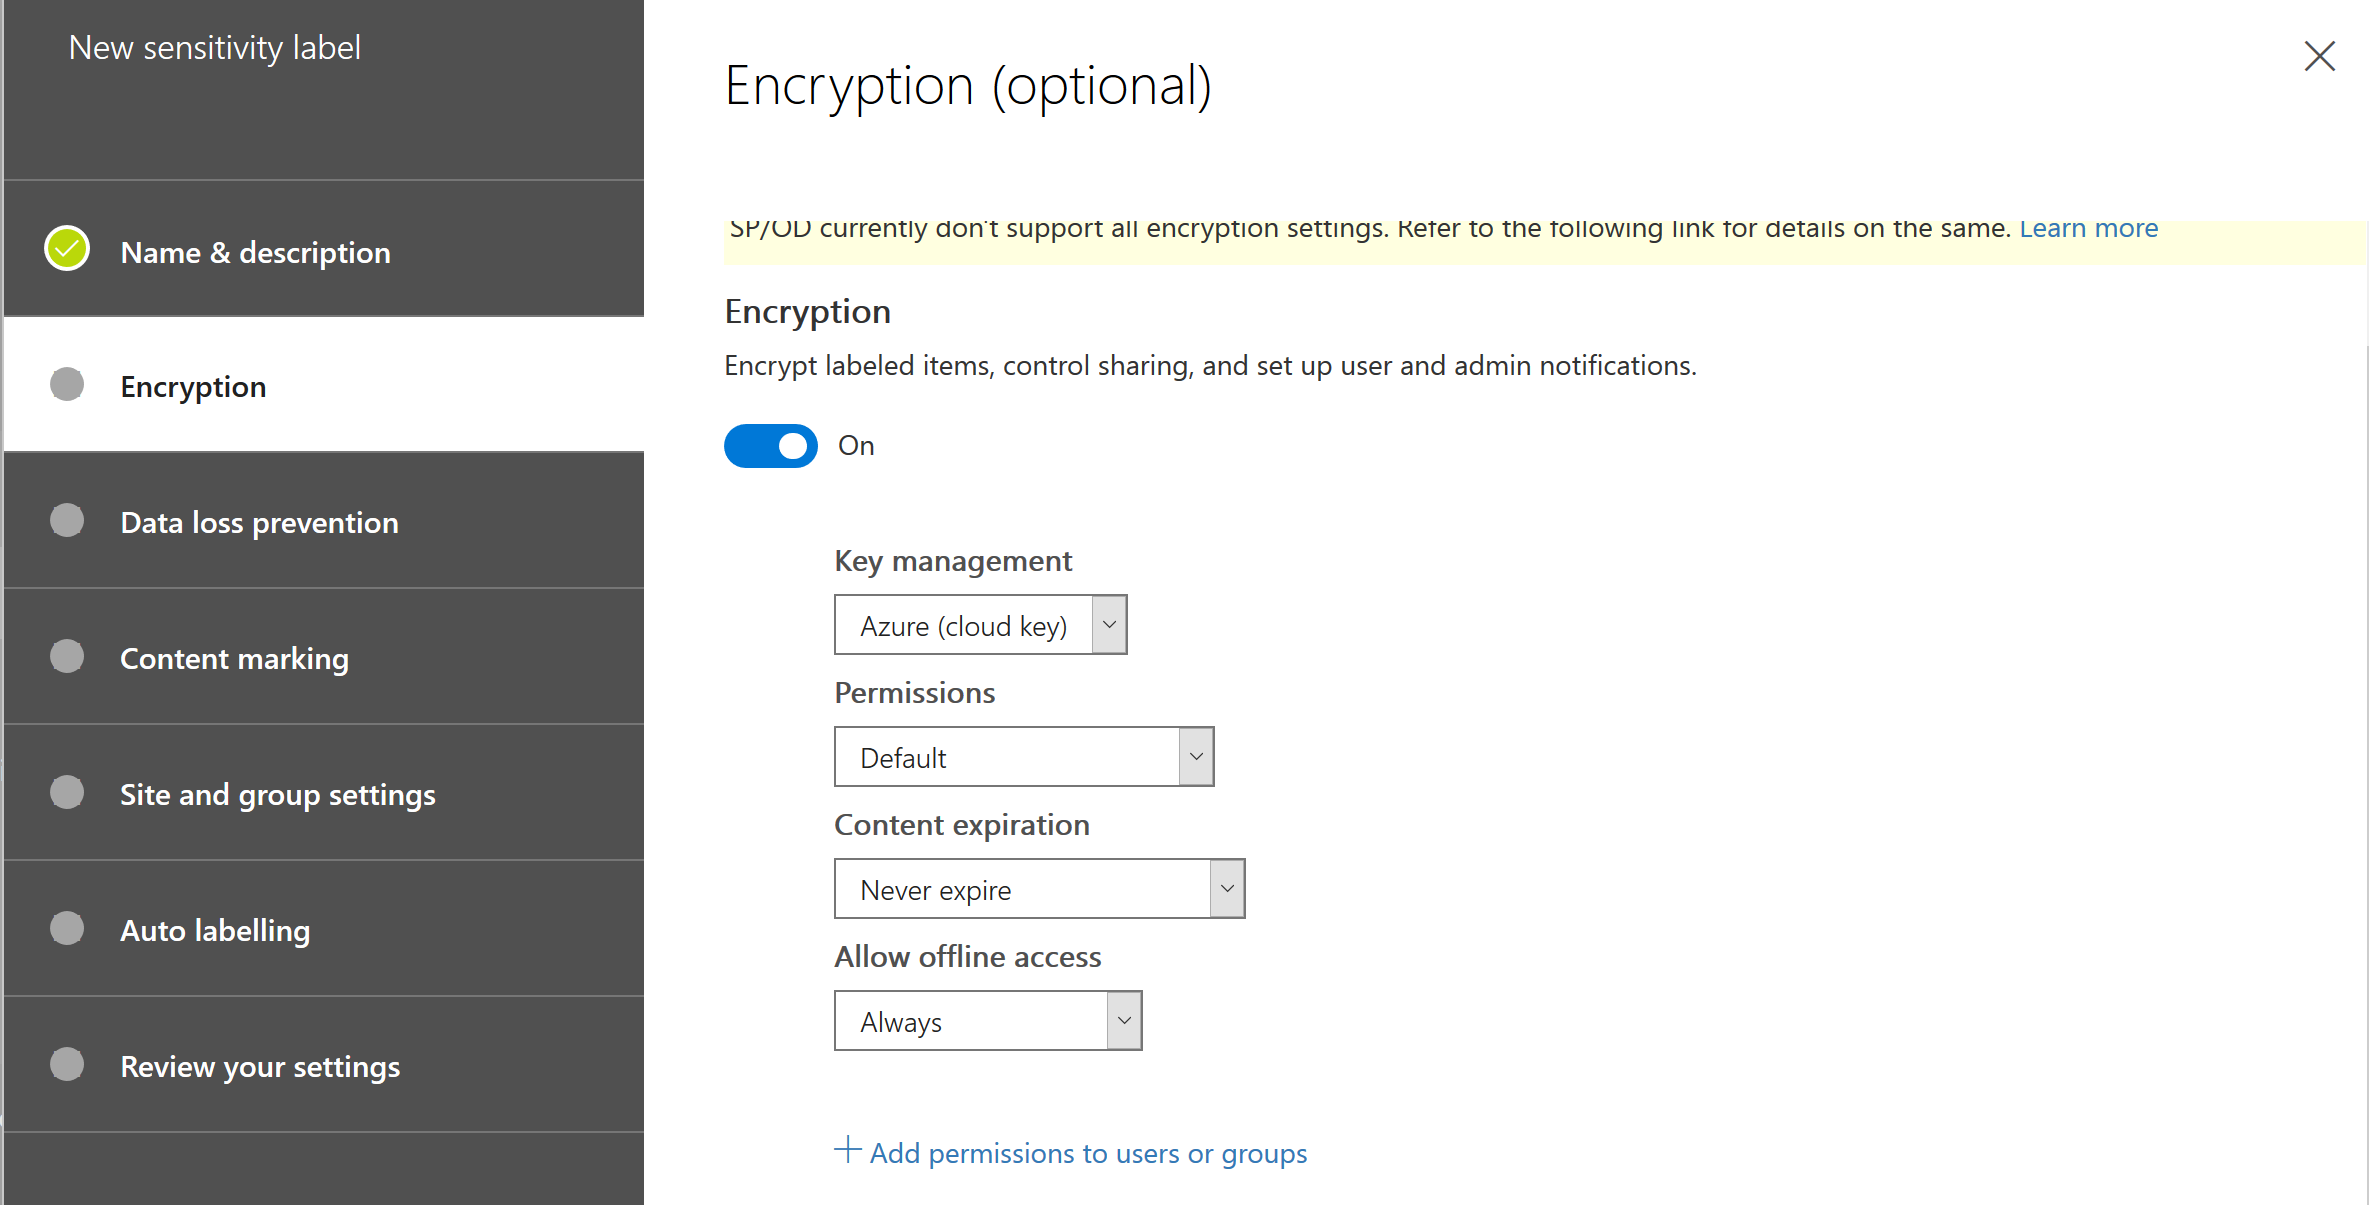
Again, a great unified feature, enable Office Information Protection.
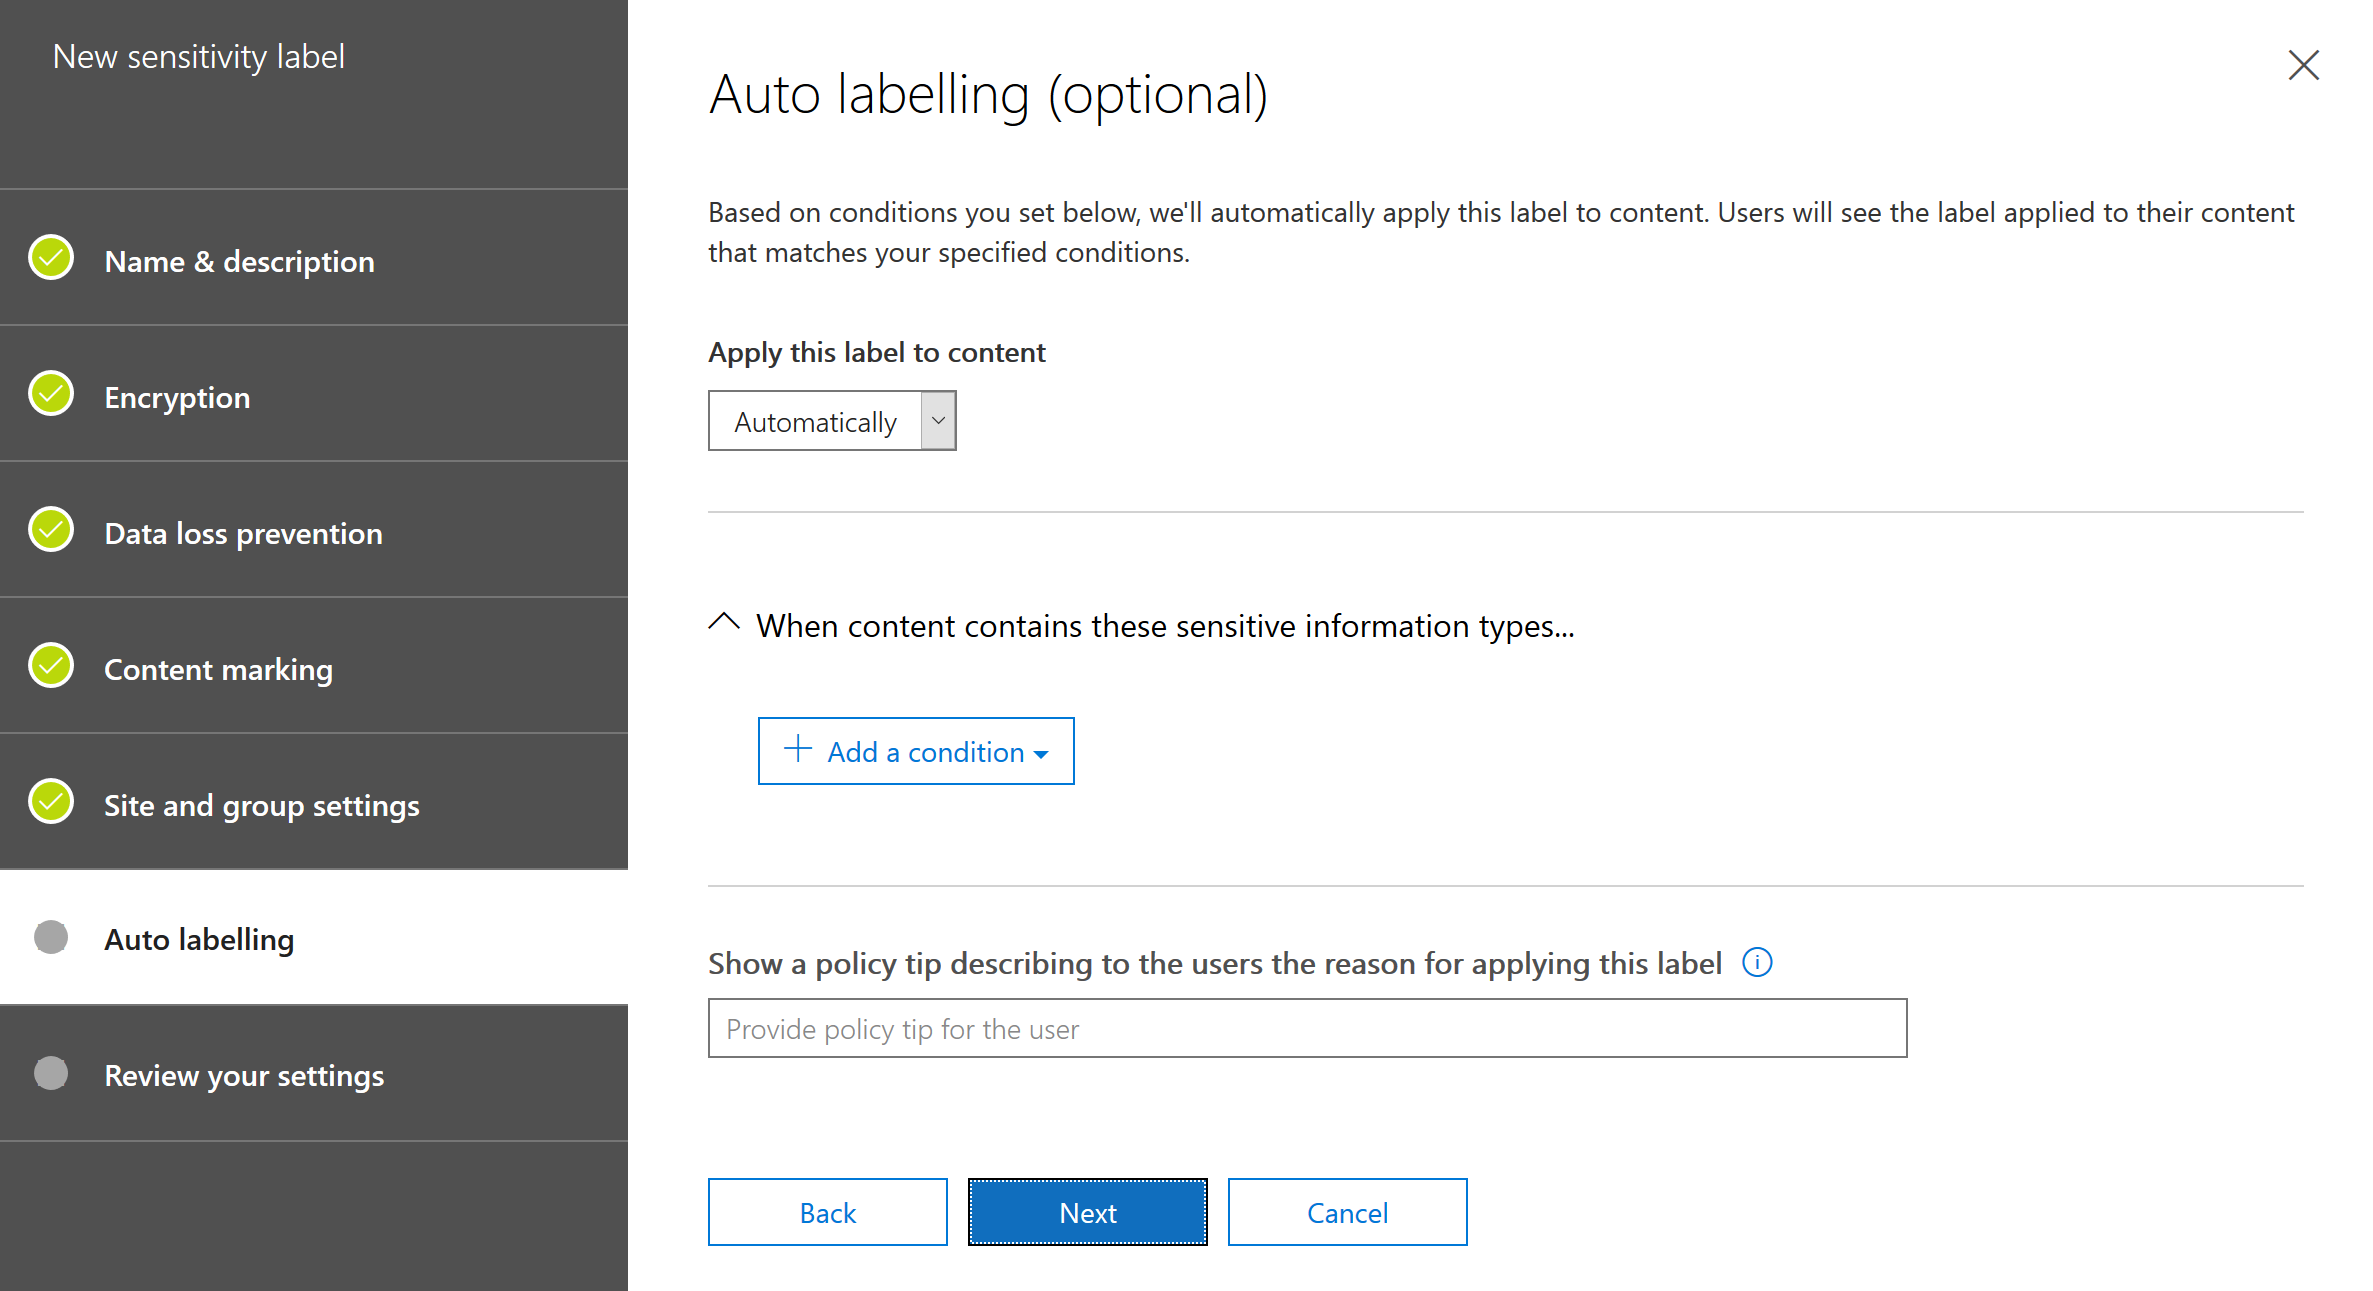
Last but not least, enable auto labeling as you are used to configure with AIP in the Azure Portal.
After this, you should publish your label.

To me, this is really a step up. Now we still have some highly requested items, like add dynamic permissions in WIP but that will come for sure (since it’s already available in Office Message Encryption).
One caveat for now, this label is not synced yet to Exchange Online so you cannot use it with Exchange rules. Hopefully they will solve this very soon since they only made these new functionalities available yesterday.
Retention labels
But that is not all, we also have retention labels now which have some very cool features. Let’s check it out. Click on retention labels and click Create a label. You will be presented with some groundbreaking features: Trigger a disposition review!
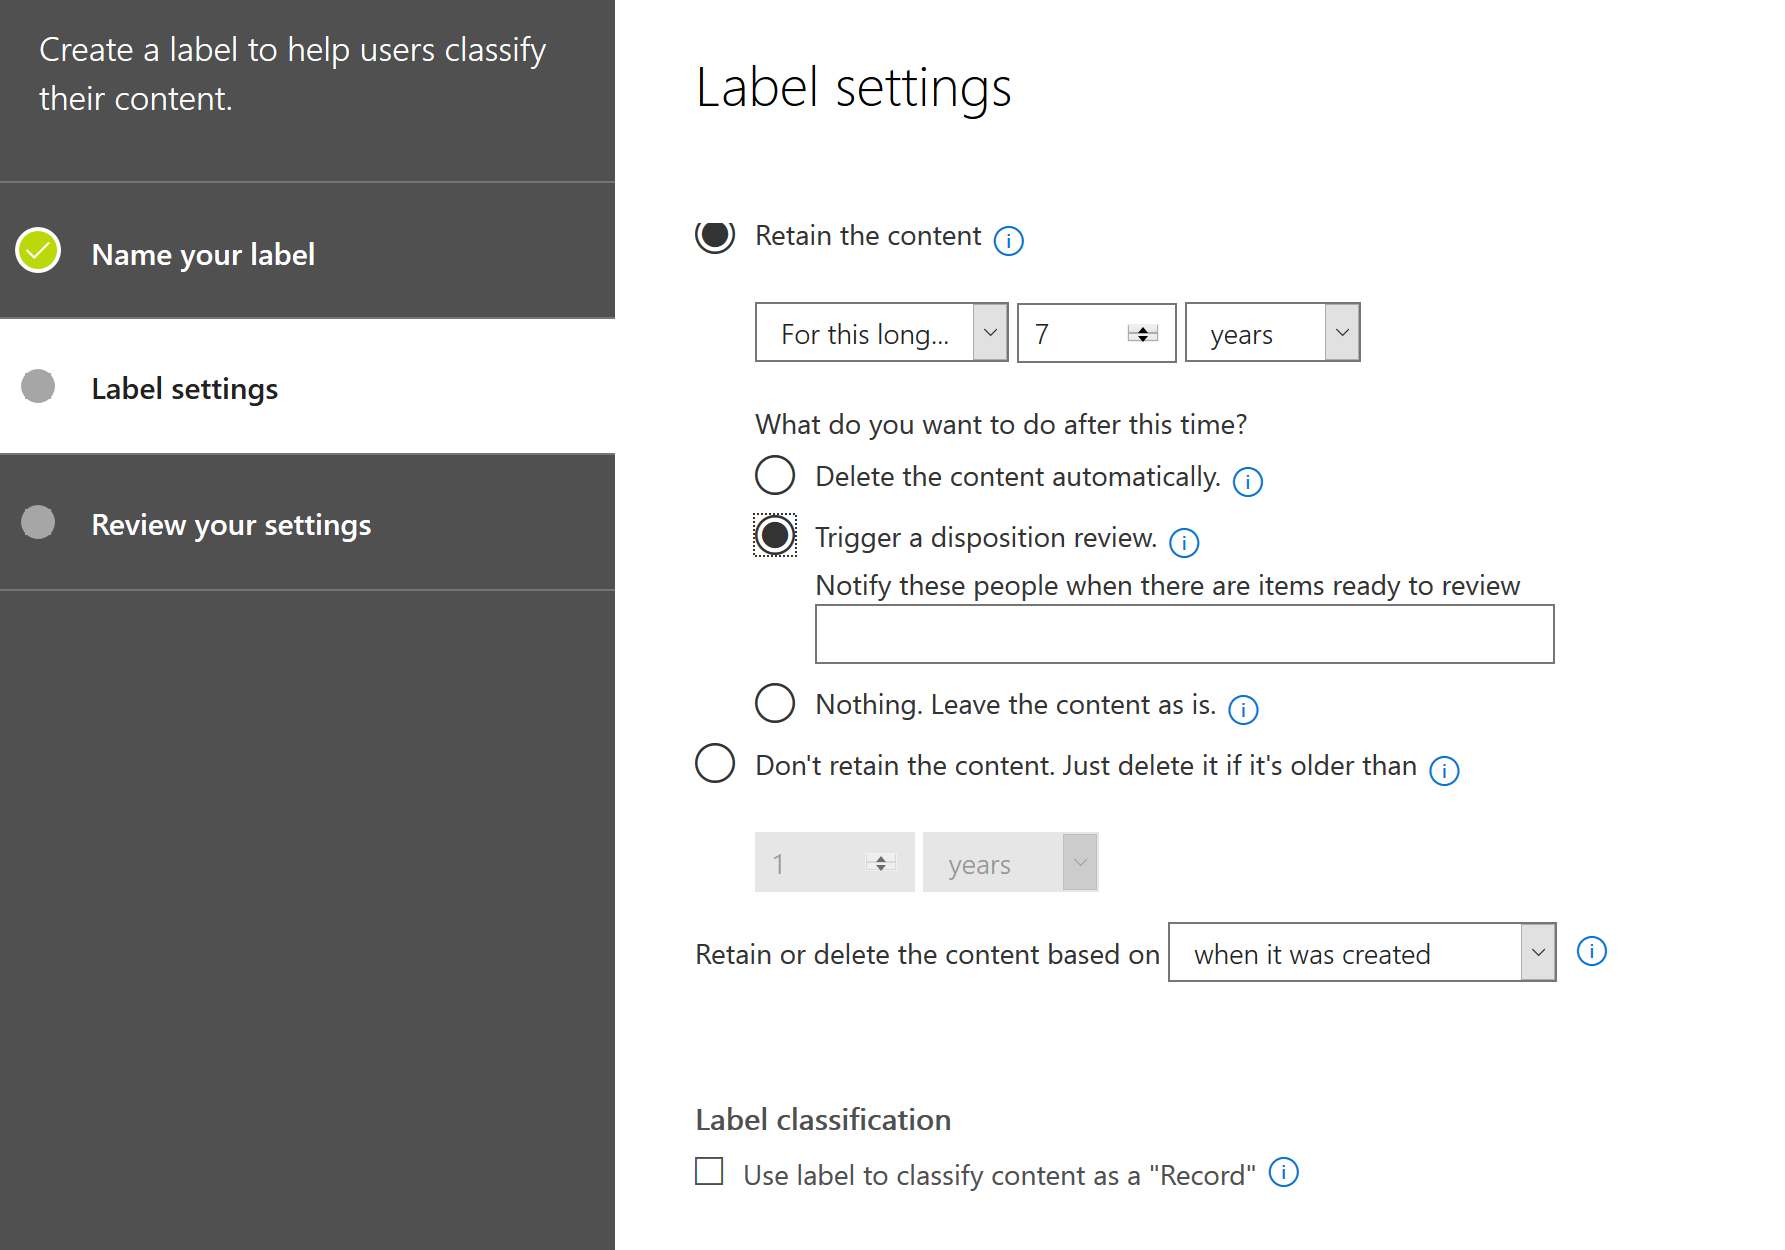
If you select this option, you give the choice to an admin, he or she can decide if that specific document must be deleted or kept. Like if job interviews are still open, you might want to hold the CV’s a little longer. Really great feature. But wait, there is even a more great feature! We can delete content based on an event. That is exactly what we need.
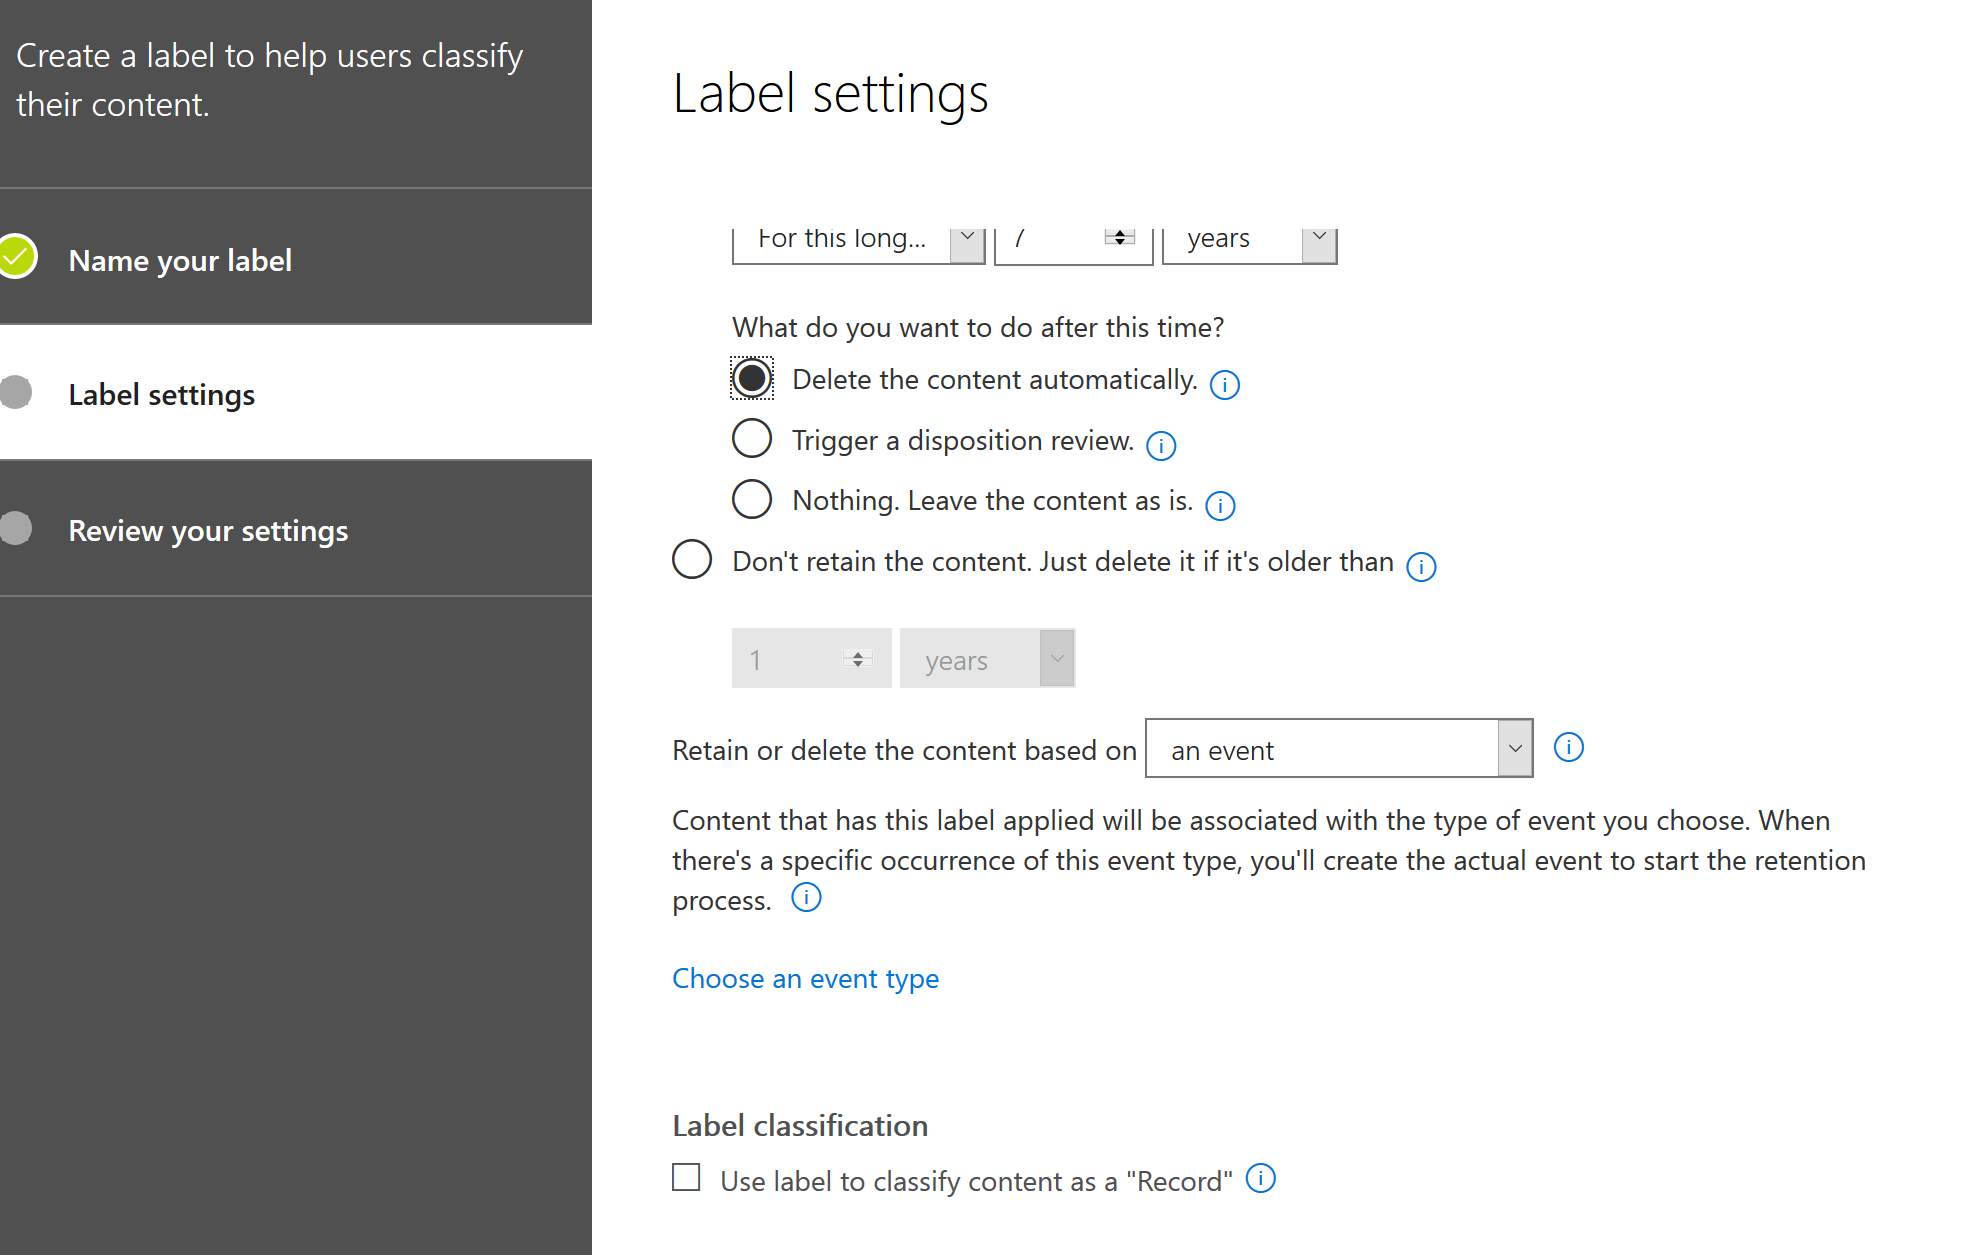
You can customize your events by going to “Data Governance > Events”. For extensive documentation, I recommend you to should the Microsoft Docs which is a really good document.
Conclusion
Microsoft’s products are getting better and better. The tight integration is getting phenomenal. In this document we have seen the possibilities of Sensitivity Labels and Retention Labels. Both serve different purposes which you should check out for sure, especially regarding sensitive content.